How to have A Low Stress First Birthday Party

I did a little research before organising my son’s first birthday party and I must say I’m really surprised at the level of pressure out there to perform when organising this event, when personally I find that very unnecessary!

Themes? Seriously? You don’t need that. For goodness sake, talk about stressing yourself out when you don’t need to! I just strung up a couple of balloons with some recycled ribbon! Prettily printed invitations sent in the snail mail? Come on! Just email your friends, easy! Thankyou bags? Maaaybbeeee, if you really want to, but doesn’t that make it all a bit too formal? I’d rather have a relaxed affair where the mums and babies can have a good time. Well, I hope my friends had a good time at our party. We just had it at the pool area of my gated commuity, where there was plenty of space. I could have invited more people, several did say they wanted to come. But I was worried about the weather forecast which predicted rain, then we would have to all cram into my small house, which would have been ok, but not as nice. Luckily, it didn’t rain. But I do think it’s nicer to have smaller gatherings, then I can relax too, and get to chat to everybody. If I had everyone over on the same day, it would have been far too rushed and hectic, and I would have worried about neglecting some of my guests. It was far nicer, for example, to have my brother and family visit on the previous Sunday so we could hang out as a family without a bunch of people they didn’t know.

One dilemma I did have was the question of gifts. If you read my blog, you might know I’m not really keen on our tradition of gift giving. But I don’t want to be a kill joy either, nor do I want to offend my friends and family. So I did some research on this topic and discovered in some forums, that some people have quite a passionate opinion on this. I would have preferred to have said in the email ‘please, don’t bring gifts’ but in my experience, that never works and some people always bring gifts anyway, no matter what you say. I found some people find it really sad and it takes the fun out of it for them. I also read that it was polite etiquette not to mention gifts at all, that to say ‘no gifts please’ implies that people should bring gifts, which some people think is rude!

My husband was home from work on holidays, so we decided we would put some nice nibblies on for the grown ups, and I decided not to mention gifts at all. That way, if people wanted to bring gifts, it was up to them if they wanted to, and at least we put on some food as a thankyou. I do think that if people bring gifts, they shouldn’t have to bring food as well. It’s not that hard to put on a bit of food. My husband baked some pesto and sweet chilli scrolls, marinated chicken wings and rosewater biscuits which were very popular. I made up a fruit platter and some dips with crackers. To further reduce stress, I tried to open gifts as guests arrived. This way there would not be a big parade of gifts everyone has to sit and watch, which I don’t like. Unfortunately, I didn’t quite manage it as three mums arrived at the same time when we were busy, so we opened their gifts after we did the cake ritual.

The fun thing is, I now have presents to make for 5 more babies as they all turn one soon, because Thomas was the eldest in our mothers group!

Easy 1st Birthday Cake

I’d highly recommend a cake like this, not just for a 1st birthday, but for older children as well.

There are two great things about this kind of cake. First is, it’s fairly easy to make and decorate. Secondly, there is no cutting of the cake, nor plates and napkins to organise. Guests simply grab a cupcake as they wish!

My husband made the cupcakes using coloured cupcake papers in a muffin tray, and a chocolate cake recipe. Then I iced them using the icing recipe on the pure icing packet. I even got blisters on my thumbs from mixing it, that’s a dedicated mum for you! Then I used writing icing in bright colours to decorate the iced cupcakes. I highly recommend that product because it was so easy to write his name, I just needed a steady hand and sat calmly on a stool at the kitchen bench. It was easy to simply put one letter of his name on six cupcakes, making the cake nice and personal.

On a whim I decided to decorate a few with pink icing! I decided there was nothing wrong with having pink icing on my son’s cake, especially his first birthday cake, as it was us who were celebrating, and as his mum I decided I needed some pink! It has certainly been a hard year that I am glad to put behind us.I’ve been looking forward all year to seeing Thomas eat a chocolate cupcake on his first birthday. For a couple of months there I was worried he wouldn’t be able to do it. Feeding my baby and making sure he ate enough has been my main worry all year, although he’s never been technically underweight he’s always been a small baby and small eater. I was so happy when he finally devoured his cupcake for all to see, making a very big mess!

Surprisingly, or perhaps not so, the pink cupcakes went first. Most of the guests were mums, and we all like a bit of pink sometimes. They were very, very yummy!!

Handmade 1st Birthday Card for Thomas

Thomas turned one nearly a month ago, but we’ve been so busy catching our breath after a very busy Christmas season, this is the first chance I’ve had to blog about it!

This was our first ‘proper’ Christmas with Thomas, as his first Christmas was spent in the hospital nursery, and I was still in hospital that day myself. That’s why we decided we should make an extra effort this season, and visit everyone in the family, which we managed to do, except for seeing my sister and her family in Darwin. We hadn’t gone anywhere all year, with Thomas being so small I didn’t feel confident enough. So Christmas was a very busy season for us indeed this year, and we’ve decided we should spread things out a bit better next year so it’s not so overwhelming!

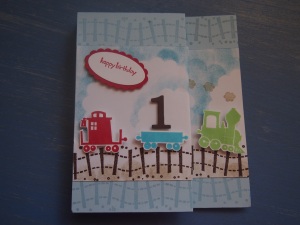
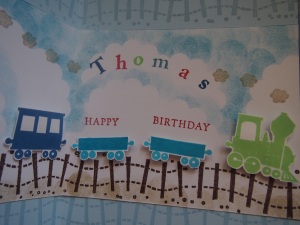
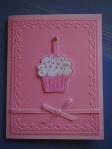
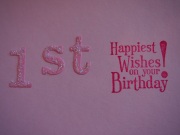
One thing we can’t change though is Thomas’ birthday, which is on December 14th, right when things start to get busy. We had to have a party of course, in fact we celebrated all week with visits from family and friends spread out so our small home would not be too crowded in case it rained. Thankfully it didn’t rain! My mum came to visit Thomas on the day though, and brought gifts and this very special handmade 1st birthday card.

I just adore my mum’s handmade greeting cards, don’t you? They are so special. I’m trying to convince her to try and sell some, I think they might be popular!

Monster Beanie for a Small Child

I made this monster beanie yesterday, thinking it was going to be a gift for a 1 year old boy next weekend, but it is sooo hot right now, I really think my beanie will be an inappropriate gift! I will just have to make something else that is more summerish! Inspiration for this beanie came from googling images of ‘crochet gift for one year old boy’ then ‘crochet monster hat’, none were quite like mine.

Using some more of the sea green I have left from the Wangaratte Mill, I started by making a beanie. I fitted it to my 1 year old son’s head, to make sure it would fit, using a 4mm hook. The first 6 rows are increasing, the very first round had 16 dc. The 2nd round increasing every 2nd stitch, so it’s 2 dc 1 dc repeated *, which makes 24 stitches in the round. The 3rd round increases 2 dc 1  dc 1 dc, repeated, the 4th round increases 2 dc 1 dc 1 dc 1 dc, repeated, the 5th round increases 2 dc 1 dc 1 dc 1 dc 1 dc. After that, each row just has the same dc as the previous row. To make a beanie for a larger head, you increase the number of increasing rows, to make a smaller beanie you decrease the number of increasing rows. I make rows until the beanie covered my son’s ears. You can make it slightly shorter, or longer if you want a turned up edge. I hope that makes sense to you, because it makes sense to me!

To make the beanie look like a monster I decorated it with two eyes and 4 sharp white teeth! The pattern for the teeth is 1 ch, 2 dc 1 ch 2 dc, 1 sc, 1 sl st, (1 sc, 2 dc 1 ch 2 dc, 1 sc, 1 sl st) x 3, for 4 teeth. Pull and pinch the ch at the tips slightly to make the teeth appear pointed.  For the eyes, I made 2 flat circles in white. 1st round has 12 dc, the 2nd round has 24 as it increases 2 in every st. Then I made 2 smaller black circles, using finer black wool, I threaded the ends onto a needle to sew the eyes together and onto the beanie at the same time. To finish, I edged the eyes with varigated yarn, also from the Wangaratta Mill, to attach the eyes more securely. I think the multi-coloured edge to the eyes makes the monster more friendly looking, as does the wonky tilt to his eyes!

I’m not sure what will happen to this beanie, I might give it away, or use it as a beanie for my son this coming winter. This was so easy to make, if my friends wanted some I’m sure I could whip up some more. I like making these as the colour choice is pretty open ended, which means I can use up some of this yarn that is piling up here!

* my apologies to my fellow Australians who read UK crochet, as this is in US crochet. To convert into UK crochet sc = dc, dc = tr crochet

Small striped bag with flower & Handmade 1st Birthday Card

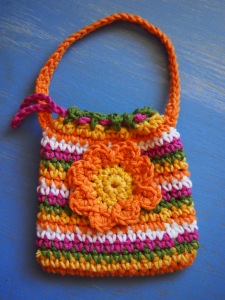
Today is the second 1st birthday in our mother’s group so we have a party to go to, it’s very exciting! I made this small striped bag with a flower as a gift, I hope she likes it!

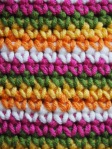
I used 5 colours from my batch of cotton blend, it’s a thick yarn so I used my 4mm hook. It’s a simple bag, changing colours every row of sc using orange, yellow, green, purple and white. I didn’t follow a pattern for the flower either, just did a couple of rounds in yellow ending up with 16 sc, then changed to orange and did 8 petals. Each petals started as 3 ch in every 2nd sc, then the second row is 5 sc into the sp with a sl st to start a new petal. I used fine cotton and needle to do a simple running stitch to attach the flower to the front. For the bag, a sc ch lip for a ch handle to be threaded through, and a larger ch handle with a second row of sc in orange. The one thing I’m unhappy with is this cotton is too thick to thread through my needle so I couldn’t finish off the ends very neatly. Instead I have to weave them in with my crochet hook which means the ends can poke through easily. Eventually there will be some loose ends visible in this bag which will make it look a little rough. Hopefully that will add to the home made character of it!

To go with this gift my mum made a special home made birthday card, which is very nice! I’ll also include a small Fisher-Price little people car inside the bag, and of course a book which I always love to give children! Children can never have too many books!

Homemade 40th Birthday Card

It’s been so long since I’ve blogged! The last few months have been full of looking after baby, he’s been having trouble with his sleeping, but he’s asleep in his cot right now so I finally have a chance to post!

It was months ago when I celebrated my 40th birthday in July with my family, my parents came to visit the day before and we all went to a local Chinese restaurant, the Landmark, for Yum Cha. It’s definitely one of the best Yum Cha places in Brisbane, if not the best. David and I like to go often, we first took Thomas when he was about 5 months old and able to sit up in the high chair. But we don’t have him sitting in the high chair the whole time, sometimes we hold him on our lap. For my birthday we didn’t have a high chair at all, and we all took turns to hold him. A special surprise (I hate surprises, by the way!) from my sister was she organised to send her eldest son Deegan down from Darwin to come to my special birthday lunch! Now, that was a surprise! Mum and dad had to go to the airport on the way to pick him up, which made them late, but of course they couldn’t tell my why they were late because it was a surprise! We ended up waiting an hour for our table, in future I must remember to go early on a Sunday, or make a reservation.

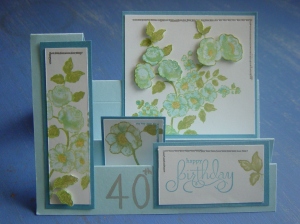
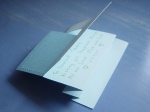
Once again mum gave me a special hand made card. This one looks very unique and tricky. It’s so unusual I wasn’t sure how to open it, but the message was hidden on the back. My mum is very talented, don’t you think?

Two Handmade Birthday Cards

Two good friends from high school celebrated their 40th birthdays last month. A special occasion like this required a special something sent in the mail!

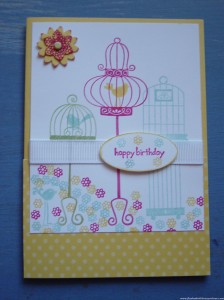
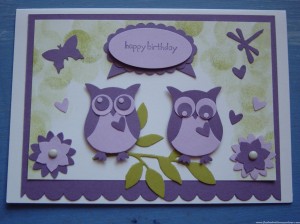
My mother has started making more greeting cards and I must say they are rather good! I chose these two to send to my old friends, and I’ve since heard they both reached their destinations safely! And that was despite rainy weather – there’s always a danger that snail mail will get waterlogged! You don’t get that problem with emails over the internet!

My friend Karen has always kept birds, usually cockatiels, so I thought the pretty card with the caged birds would be nice for her. The owls look rather cute and thoughtful so I sent them to Marina. She has since told me that owls are one of her favourite things, possibly due to being a librarian, but I’m not sure!

Pink and Purple Dolly Blankie

It’s my niece’s 4th birthday today, and on her wishlist was a ‘Barbie Doll Blanket’, so I hope this is what she had in mind!

The rug should be pink and purple, apparently. Luckily I had just enough of these colours in my scrap bag to make it. I used up the tiny bit of variated white wool left over from my flowers baby rug, and the bit left over purple dimples yarn which I also used for the purple baby jacket. For the pink flowers, I had a small bit of yarn left over from my childhood when my mum had taught me how to crochet, so that wool is very special, as I’ve been carrying it around with me for a very long time! For the jazzy edge I used a bit of fluffy yarn my mum gave me last year some time. All of these yarns are probably acrylic. If this rug needs a wash, it would need to be gentle or it might fall apart.  It would be best to spot clean it, or a gentle hand wash in cool water and gentle detergent, drying flat in shade should be ok.

It took me a couple of hours to do up the 24 tiny granny squares, then a couple of hours to stitch them all together. I find stitching granny squares together the most tedious, there doesn’t seem to be a quick enough way to do it. I used some cotton and a big needle and tried to get it done in an efficient time. Putting the cute fluffy edge on it only took a few minutes in comparison. I used a 3.5mm hook and the end result measures 18cm x 28cm, just big enough for a Barbie to be able to use as a blankie!

I hope my niece enjoys the things I’ve made for her this year, which includes everything I made for yesterday’s post, as well as the child’s cotton sun hat and the pretty pink and purple bag!
❤ ❤ ❤

David's Fingerless Gloves

I bought another ball of this lima alpaca wool from Lincraft when it was on special to make another pair of fingerless gloves for David, this time I made up my own pattern to fit.

David has been wearing the first pair of fingerless gloves I made, but they are a little small for him, being too short and tight to pull on. It’s his birthday today, so I just had to make him another pair in matching wool, this time longer and wider. And just in time for winter to be nearly over, too! At least he’ll have them to wear all next winter! This longer pair of fingerless gloves weighs over 60g so took more then 1 x 50g ball of alpaca, and I used a 4mm hook.

My pattern for David’s fingerless gloves
1. ch 36, sl st to join and form a circle, taking care not to twist the chain, ch 2, treble (US dc) in 1st ch on the right of ch 2 to form a ‘cross-stitch’, (sk 1 ch, tr in next ch, tr in sk ch) repeat to end, sl st in top of 1st cross-stitch (18 crosses)
2. sl st into next space, ch 2, treble in top of 1st cross-stitch (sk top of next cross, treble in next space, treble in top of sk cross) repeat to end, sl st in top of 1st cross (18 cross-stitches)
3-13. repeat row 2 until there are 13 rows of cross stitches
14. ch 2, treble in top of cross to the right of ch, ch 10 (thumb hole), sk 2 cross-stitch, sl st in between 2nd and 3rd cross, sl st 2 up the ch, treble in top of 2nd cross, sk top of 3rd cross, treble, treble in top of sk cross, repeat until end, sl st in top of 1st cross (17 cross-stitches)
15. ch 2, treble in top of cross to the right of ch, sl st in thumb hole, 4 dc (US sc) in thumb hole, treble in between next 2 crosses, treble in top of cross to the right to create cross, repeat cross-stitch pattern to end, sl st in top of 1st cross (16 cross-stitches)
16. sl st 1, ch 2, treble in top of cross to the right of ch, sk 1 dc, sl st in next 2 dc, sk 1 dc, treble in between next 2 crosses, treble in top of the 1st of those 2 crosses, sl st in top of 1st cross (16 crosses)
17. sk 1, sl st1, sk 1, sl st 1, sl st 1, ch 2, treble in top of 1st cross left of thumb hole, repeat cross-stitches to end, last one goes in sl st over thumb hole, sl st in top of 1st cross (16 crosses)
18. sl st, ch 2, treble in top of cross (sk 1, treble, treble in sk) repeat to end (16 cross-stitches)
19, 20, 21. repeat row 18

For David’s birthday, I also bought him a father-to-be book with a cute lovey-dovey book mark to go with it. He’s being such a trooper and so supportive of me right now, I wanted to get him something to help him from a father’s point of view. This particular book comes recommended and it made him laugh in the book store when he saw it, so I got it for him. And it’s good timing too, Father’s Day is a week after his birthday!

Also for David’s birthday, we got him an electric mixer! It might not sound like a good present, but it certainly isn’t for me as I won’t be baking! David loves to bake and is very good at it, so a proper machine will make it even more fun for him! If you would like to see some of the things David likes to cook, be sure to check out his cooking blog @ daves-home-cooking.blogspot.com

Happy Birthday, my darling David ❤ ❤ ❤

My 39th Birthday

Last Sunday was my 39th Birthday, and David baked a wonderful meal to share with my parents who came to visit.

David made pumpkin soup, this time without the chilli, a roast chicken dinner and this amazing classic baked cheesecake with a passion fruit top! As always, his cooking was fabulously perfect and a wonderful birthday gift.

Mum and I talked a lot about crochet and she brought me a big bunch of wool. She also gave me a great transparent bag which will be perfect for crochet projects.
We had a lovely, relaxed day and watched Alice in Wonderland with Johnny Depp. I can’t help but think that my next birthday will be very, very different!

❤ ❤ ❤