The Wooden Blocks Pa Murphy made

Here are some simply delightful wooden blocks, and a special red and green wooden train made by Pa Murphy as a gift for Thomas!

Isn’t this collection of wooden toys just lovely? Its so much nicer than the mass produced blocks you buy from the store. All the more special are these toys because they were made for Thomas by his grandfather. These are something you would want to keep and treasure, and hopefully pass on one day, because no one has anything quite the same as these wooden toys. I’m not sure where the wood came from originally, but I think these are at least some what environmentally friendly because they were made from scraps of wood from Pa Murphy’s workshop. For something like this you really shouldn’t buy any wood especially, as any tiny bits of left over scrap wood of any shape will do. These were lightly coated with vegetable oil so a very nice, environmentally friendly toy for Thomas!

Another reason why I like these toys is because they are a classic and timeless toy that doesn’t have the branding you see everywhere nowadays. As much as possible, I’d like to help Thomas learn the true value of things, and not according to if they have some recognisable logo or image on them, as hard as I know that is going to be!

Definitely an addition to my collection of hand crafted family heirlooms! Thankyou Pa Murphy ❤

My New Year’s Resolutions

Last year, I didn’t have any resolutions, other than to survive my first year as a mum! The previous year my goal was to learn more about crochet, to try and learn how to read patterns. Well I did that, and my baby son is doing very well now too, so now its time to think of a new goal for the new year!

My goal for 2012 is to use up as much of the yarn that has accumulated around here as possible! I hope to make lots of useful items for friends and family, and perhaps try and sell some things on ebay. I really must try very hard not to buy any more yarn! I’m sure I have a lifetime’s supply here already!

My other goal is to sell a lot of other things on ebay, things that we don’t need or use and no longer have room to store. Our flat is pretty small and its made to feel smaller than it is with all the clutter. My goal for this year is to stream line my house, ready for a possible house move at the end of next year.

Of course, my other goal for the year is to be a good mum! I want to get Thomas into music lessons, and to take him swimming more. And we need to do some more socialising, too!

I think it’s useful to start the new year with a new goal, something that is achievable, and something that you will enjoy doing. A feeling of accomplishment is important as we look back over our past year, especially for people like myself who don’t work at a job. Even if you don’t achieve everything you set out to, it’s good to celebrate the gains you have made, even the smallest ones.

What are your new year’s resolutions?

Easy 1st Birthday Cake

I’d highly recommend a cake like this, not just for a 1st birthday, but for older children as well.

There are two great things about this kind of cake. First is, it’s fairly easy to make and decorate. Secondly, there is no cutting of the cake, nor plates and napkins to organise. Guests simply grab a cupcake as they wish!

My husband made the cupcakes using coloured cupcake papers in a muffin tray, and a chocolate cake recipe. Then I iced them using the icing recipe on the pure icing packet. I even got blisters on my thumbs from mixing it, that’s a dedicated mum for you! Then I used writing icing in bright colours to decorate the iced cupcakes. I highly recommend that product because it was so easy to write his name, I just needed a steady hand and sat calmly on a stool at the kitchen bench. It was easy to simply put one letter of his name on six cupcakes, making the cake nice and personal.

On a whim I decided to decorate a few with pink icing! I decided there was nothing wrong with having pink icing on my son’s cake, especially his first birthday cake, as it was us who were celebrating, and as his mum I decided I needed some pink! It has certainly been a hard year that I am glad to put behind us.I’ve been looking forward all year to seeing Thomas eat a chocolate cupcake on his first birthday. For a couple of months there I was worried he wouldn’t be able to do it. Feeding my baby and making sure he ate enough has been my main worry all year, although he’s never been technically underweight he’s always been a small baby and small eater. I was so happy when he finally devoured his cupcake for all to see, making a very big mess!

Surprisingly, or perhaps not so, the pink cupcakes went first. Most of the guests were mums, and we all like a bit of pink sometimes. They were very, very yummy!!

Handmade 1st Birthday Card for Thomas

Thomas turned one nearly a month ago, but we’ve been so busy catching our breath after a very busy Christmas season, this is the first chance I’ve had to blog about it!

This was our first ‘proper’ Christmas with Thomas, as his first Christmas was spent in the hospital nursery, and I was still in hospital that day myself. That’s why we decided we should make an extra effort this season, and visit everyone in the family, which we managed to do, except for seeing my sister and her family in Darwin. We hadn’t gone anywhere all year, with Thomas being so small I didn’t feel confident enough. So Christmas was a very busy season for us indeed this year, and we’ve decided we should spread things out a bit better next year so it’s not so overwhelming!

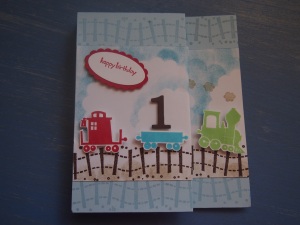
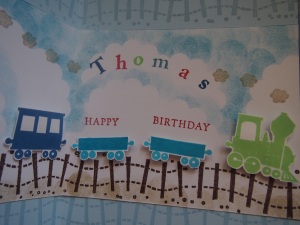
One thing we can’t change though is Thomas’ birthday, which is on December 14th, right when things start to get busy. We had to have a party of course, in fact we celebrated all week with visits from family and friends spread out so our small home would not be too crowded in case it rained. Thankfully it didn’t rain! My mum came to visit Thomas on the day though, and brought gifts and this very special handmade 1st birthday card.

I just adore my mum’s handmade greeting cards, don’t you? They are so special. I’m trying to convince her to try and sell some, I think they might be popular!

Monster Beanie for a Small Child

I made this monster beanie yesterday, thinking it was going to be a gift for a 1 year old boy next weekend, but it is sooo hot right now, I really think my beanie will be an inappropriate gift! I will just have to make something else that is more summerish! Inspiration for this beanie came from googling images of ‘crochet gift for one year old boy’ then ‘crochet monster hat’, none were quite like mine.

Using some more of the sea green I have left from the Wangaratte Mill, I started by making a beanie. I fitted it to my 1 year old son’s head, to make sure it would fit, using a 4mm hook. The first 6 rows are increasing, the very first round had 16 dc. The 2nd round increasing every 2nd stitch, so it’s 2 dc 1 dc repeated *, which makes 24 stitches in the round. The 3rd round increases 2 dc 1  dc 1 dc, repeated, the 4th round increases 2 dc 1 dc 1 dc 1 dc, repeated, the 5th round increases 2 dc 1 dc 1 dc 1 dc 1 dc. After that, each row just has the same dc as the previous row. To make a beanie for a larger head, you increase the number of increasing rows, to make a smaller beanie you decrease the number of increasing rows. I make rows until the beanie covered my son’s ears. You can make it slightly shorter, or longer if you want a turned up edge. I hope that makes sense to you, because it makes sense to me!

To make the beanie look like a monster I decorated it with two eyes and 4 sharp white teeth! The pattern for the teeth is 1 ch, 2 dc 1 ch 2 dc, 1 sc, 1 sl st, (1 sc, 2 dc 1 ch 2 dc, 1 sc, 1 sl st) x 3, for 4 teeth. Pull and pinch the ch at the tips slightly to make the teeth appear pointed.  For the eyes, I made 2 flat circles in white. 1st round has 12 dc, the 2nd round has 24 as it increases 2 in every st. Then I made 2 smaller black circles, using finer black wool, I threaded the ends onto a needle to sew the eyes together and onto the beanie at the same time. To finish, I edged the eyes with varigated yarn, also from the Wangaratta Mill, to attach the eyes more securely. I think the multi-coloured edge to the eyes makes the monster more friendly looking, as does the wonky tilt to his eyes!

I’m not sure what will happen to this beanie, I might give it away, or use it as a beanie for my son this coming winter. This was so easy to make, if my friends wanted some I’m sure I could whip up some more. I like making these as the colour choice is pretty open ended, which means I can use up some of this yarn that is piling up here!

* my apologies to my fellow Australians who read UK crochet, as this is in US crochet. To convert into UK crochet sc = dc, dc = tr crochet

Five dollar limit on gifts a Great Idea!

There are so many cute little gift ideas under $5, especially for babies and young children, there’s no need for the gift giving ritual to be excessively expensive!

Now I’m a mum I’m making more of an effort with Christmas this year. Granted I could make more of an effort than I have, but this year I’m just warming up! Next year I’ll be even more organised! Today I brought in our living Christmas tree and decorated it, it does look a little small, scrawny and sad, but not as much as last year! And next year, if all goes well, the Christmas tree should look better and bigger after a year of growth. I couldn’t put much decoration on it at all, it started to lean over so much, so I could only put one small star on it, and the love heart garland I made last year.

All the gifts I’m giving this year, or should I say Thomas is giving this year, cost $5 or less. As much as I’m actually not that keen on Christmas, I don’t want to be the mean spirited parent who makes my son miss out on something that is an undeniably big part of our culture. So Thomas is giving everyone a small gift this year, especially considering all the generous gifts he got from them when he was born! But I do wish others were not so extravagant with their gifts, because we can’t afford to reciprocate. But there are so many cute things you can give for just $5 or less! Some ideas for this year include books and a toy car I found on special for the kids, gluten free chocolate biscuits for my coeliac brother and framed photos of Thomas for the grandparents. I prefer to buy children’s books second hand from the charity stores, as they usually only cost 50c. Sometimes I can pay $2 for a second hand book, which is still a lot cheaper than most new ones, but I found some nice ones for $4 at the department store.

Its not hard, and when Thomas is older I hope to teach him some graciousness when it comes to gift giving, even if his mum is clearly lacking in that department!

Homemade Gift Tag for a Young Child

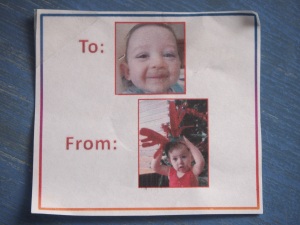
I love this home-made gift tag made by our friend Lyndal for this year’s Secret Santa!

Isn’t technology great? To make this simple gift tag, perfect for a young child, all you need is a colour printer and access to the internet. Lyndal found a picture of Thomas on my facebook page, and printed it up along with a picture of her daughter, Isabella. And I just love the cheeky grin in this photo, when Thomas has chocolate custard smeared all over his face! This kind of gift tag is perfect for young children who are learning to read.

Thanks for this wonderful idea Lyndal, I think I might just have to use it myself this Christmas!

My Early Ebay Adventures

There’s so much I’m doing at the moment that I’d like to blog about, but time is so precious right now, it’s been a matter of choosing between the doing or writing about the doing, so the doing has been winning out!

When Thomas was still in the hospital nursery, David and I decided we needed a new mattress on our bed, as my old one was starting to feel uncomfortable. Looking back, I don’t know why we didn’t take the delivery guys offer to remove the old mattress! Why did I think I still needed the old one? We had no room for it, so for the next 10 months, it stood up on it’s side in our spare room which cast a very gloomy atmosphere over it, and it couldn’t have been doing the mattress any good leaning up against the wall like that. I couldn’t think what to do with it, as most charities say they don’t like to accept donations of mattresses, so would they come and pick one up? Like most things around our small rented 3 bedroom town house, our possessions seemed to be taking over, crowding me in. I just didn’t know what to do with all this extra stuff we had accumulated over the last 4 years. Then it finally occurred to me that I could try and sell the mattress on ebay.

I had bought a couple of things from ebay in May 2010, including a beautiful cane doll’s furniture set that has featured on my blog before. But I had never sold anything. My overwhelming feeling was that I was too afraid to sell something in case the buyer would be unhappy, I imagined them harassing me for their money back, which would make me feel terrible! This was yet another avoiding behaviour of mine, while living like a hermit for 3 years, hiding from the world. But ever since David and I decided to start a family in early 2010 I’ve been getting braver, so I’ve been changing the way I live my life, the benefit of my child being the main motivator. So I had a go, and listed the queen size mattress on ebay!

I started bidding at $0.99 thinking I really just needed someone to come and pick it up. Oh, please won’t someone come and take our old mattress away? And sure enough, bidding started that night, and by the end the auction closed at $10.50! More than I expected, that’s for sure. And the sale went just fine, the lady came and pressed the money into my hand and took the mattress away in the back of her station wagon. We were worried that she didn’t have enough room, she had 2 teenagers with her, and one had to crouch down below the mattress in the back seat! And then later that night, I had some positive feedback! I was on my way to becoming an ebay seller!

Since then I’ve sold David’s old fish tank, which sold at an amazing $52 from a starting bid of 99c, a near new blender for $16.50, a wok for $5.50 and a plastic cheese grater for $3! Its surprising when these people came to pick up their items that most were under prepared. The fish tank ended up being put on her sons lap! But I’ve also made a couple of reckless purchases which I now regret and promise to be more careful of in future! I got it into my head that I wanted to buy a doll that I had from my childhood that I had lost. I saw a picture of her on facebook, and now I knew what her name was so I could find her for sale, she was a Beauty Secrets Barbie from 1979. I saw a listing for a group of 8 dolls, most I didn’t recognise, but there she was, as well as the Ballerina Barbie from 1975, which I also had as a little girl. So I bought it, and after postage, it cost me $51.56! /gasp! But it gets worse, I also bought some doll furniture which I recognised, which included some dolls clothes, for about $55! So feeling guilty, I now need to clean it all up and sell it, to try and get my money back for making such frivolous buys! Oh, ebay how yee tempts thee!! I hope to find more time soon to blog about what I’m doing with these vintage dolls and clothes from the 1970s, and the journey I had learning to identify them!

My goal at the moment is to get rid of possessions we no longer need or use, which in this place we just don’t have the room for. I’ve now learned its far better to offload these things sooner, rather than to keep carting them around from place to place for years just in case we might need them one day. I can finally see a light at the end of the tunnel that was an incredibly disorganised and cramped house. Now I dream of a streamlined, Spartan home that is easy to clean, and most importantly, easy to move when the time inevitably comes to do so.

Our Potted Garden, Spring Update 2011

Every spring I like to do an update on our potted garden, to look back and see what has survived the winter. Each year, we’re learning which plants are worth investing effort so we get as much enjoyment out of our garden as we put in. Here’s a link to last year’s update. During last summer, our baby son arrived 2 months early and I was also very ill, so our garden was severely neglected. But some plants really hung in there and have perked up after some recent tender care. The pumpkin and chamomile didn’t survive the winter though, and a new addition that’s been a success so far is the capsicum!

BASIL
I still have the three bushes of all-year-round basil. The eldest just doesn’t seem to want to give up, I keep removing the flowers, it keeps going on. Last summer the basil was very neglected and ended up very scrawny. I pruned it harshly, and now the three bushes are looking much better, even the eldest is still producing fragrant leaves. This is a surprise, as it must be 3 years old by now. The second season of sweet basil that the landlord Rose gave me finally died, but David’s father gave us some basil seeds planted in a pot when they last came to visit. These are now sprouted and David has planted the biggest of these into pots, we now have several new sweet basil plants for this season.

CAPSICUM
We collected some seeds from some capsicums and planted them in some pots. The strongest of the seedlings were planted into bigger pots, three to a pot. Now they are growing  fruit for our cooking! David keeps up the seaweed fertiliser on these, as with all the other flowering plants, to encourage them to keep fruiting and stay healthy.

CHILLIES
We’ve discovered to keep the chillies really happy, they simply need to be re-potted into new compost rich pots every year. We had several 2 and 3 year old plants that were looking terribly miserable and sure to die, we replanted half of them and they have done amazingly in a very short time. There are 3 very small 2 year old plants left that are in desperate need of a re-pot, which we hope to do this weekend. Even when they are scrawny, they still keep producing the red fruit so we always have some for our cooking. David’s father gave us a new variety of chilli plant, which now has its own large pot and is doing exceptionally well and is full of white flowers.

CHIVES
When the garden was being neglected, the chives suffered from a terrible case of a pest infestation, we think they were tiny black aphids. David had to spray them several times with pyrethrum until now they finally have perked up to their former happy selves. The problem though is that I’m guessing its because of that they haven’t flowered this year. Hopefully they will flower next season so we don’t loose our crop. David’s father has also given us some new chives, so we should be ok.

LAVENDER
After I pruned it last year, it has grown back and is flowering nicely, but now has some more branches growing in odd directions. It looks like it needs another prune, but I’ll wait till after the summer to do that. No cuttings of this bush have ever taken, so I still have just the one plant which is now 3 years old.

MINT
The mint was not happy at all after last summer, we lost the lemon balm and also the peppermint that was in the same pot. Luckily I had some peppermint in another pot and that is going fine. The mint looked awful, so we bought a special pot for it, a self watering one, because it really wants to be in the sun but also to be kept moist. Now the mint is doing great! These mints all used to be in hanging pots, as well as the strawberry, but we’ve given up on the hanging pots. They were the kind that has a coconut fibre lining which turned out be way too dry, all the moisture just seeped right out. The lining has been thrown into the garden for the birds, in case they want to use it to line their nests like they did last spring, and the metal cases are stored in the garage. Maybe one day we’ll live somewhere where they’ll come in handy.

PARSLEY
I don’t know what to do with our parsley! Its become very thin, with just a few individual plants, it doesn’t seem to be reproducing. It was supposed to flower and seed, which it has never done, and some of it is now 3 years old. David’s father has given us some new parsley so hopefully that will grow a bit better. Its so sparse at the moment that we can hardly use it in our cooking.

OREGANO AND MARJORAM
I still only have the two plants, one of each. They are looking very modest, but at least they survived last summer! They are now out in the sun with the rest of the plants. We’ve put all our pots where they can get rain, so no more pots under the roof. The oregano and marjoram are still in the same small pots on the shelf, which is now by the fence where they can get some sun.

DWARF LIME TREE
David’s mum helped him prune the lime tree when she visited us in the summer. This spring, it has sprouted shoots all over, even in the bare section that’s persisted all this time. Last season we did get a few more limes than the 3 we got the year before, and these got used in David’s cooking, mainly his spaghetti and meatballs. We lightly top dressed it again this winter, as we were just not brave enough to prune the root ball. Looks like it is doing fine without us doing that!

ROSEMARY
The rosemary is doing so well that I decided to invest in two new big pots for them. These plants seem very tough and managed the major neglect just fine! They were just kept in the sun the whole time, had good drainage, and didn’t complain at all.

ROCKET
Our amazing crop of rocket seeded in the winter, and we just finished collecting the last of the seeds. We have many, many seeds from the rocket now, it did so well. Now we don’t have to always wait for the rocket to flower and can keep up new crops for eating. I’m looking forward to making some salads, instead of just having rocket on sandwiches.

TOM’s GARDEN
When David’s dad visited us, he brought with him many seedlings from his home in Stanthorpe where he grows his own food. He also made a special planter box for Thomas with all sorts of plants in it, like beetroot and broccoli. There is lettuce and spinach, which we eat and there is plenty for us, as well as David has used the shallots in his cooking. Its busting with plants right now, and is a great addition to our potted garden.

Colourful Crochet Baby Cube

I was going to make a set of these soft baby blocks, and did this first one last year before Thomas was born. Now, I don’t think I’ll make any more quite like this.

I simply made 6 x 10cm squares of various colours in the same thick cotton I used for the drink coasters. They were fairly quick to make up, then I started joining them up into a cube with the black. I chose these colours because these were the brightest colours I had at the time, and the contrasting black is attractive to the eyes of babies. I then packed the inside with stuffing consisting of scraps of material saved from my sewing projects. I was unhappy with how the cube shape came out. If I packed it too much, it started to resemble a sphere! So I had to remove some stuffing, then the cube was a bit sloppy. So if I make any more cubes like this, they will need a firmer stuffing in the shape of a square, and the cube will have to be made to fit the stuffing. Hence why I probably won’t make any more, as I don’t have any stuffing material like that on hand, and I don’t want to buy it as I think it’s too expensive for what it is!

So here is an odd shape to throw into Tom’s toy box. Maybe in future I can make a sphere and a rectangle to match …

In other news, our little family has just got over colds that Thomas caught at a playgroup I took him to last week. That was the first time I’ve taken him to a playgroup and I won’t be taking him back. All we got out of it was the cold! This is the first time Thomas has had a runny nose and only the second time he’s been sick as the first time was a sore throat with fever. It was so awful listening to him breath through a runny nose all night! I know it’s good for his immune system to start building up resistances to these germs, but I don’t think he should spend his entire babyhood sick and uncomfortable. Getting sick only twice in 10 months is doing pretty well so far, considering how much illness is around!

Previous Older Entries